
What To Install First: Ceiling Or Walls?
Drywall Contractor Serving Massachusetts Homeowners and Remodeling Contractors since 2001.
Top rated by clients
★★★★★
Importance of Proper Drywall Installation
Proper drywall installation is the cornerstone of a smooth, aesthetically pleasing interior finish. When executed correctly, drywall provides a seamless canvas for paint, wallpaper, or other decorative treatments. Its importance goes beyond mere aesthetics; proper installation also ensures structural integrity, soundproofing, and fire resistance. A poorly done drywall job can lead to visible seams, cracking, and other defects that detract from the overall quality of your space. Therefore, understanding the correct techniques and sequence of drywall installation is crucial for achieving professional results.
One of the primary reasons for emphasizing proper drywall installation is the role it plays in the longevity of your walls and ceilings. A well-installed drywall system can last for decades, remaining sturdy and crack-free. Conversely, mistakes during installation can lead to issues such as sagging ceilings, uneven surfaces, and compromised structural support. These not only affect the visual appeal but can also necessitate costly repairs down the line. By following best practices, you can avoid these pitfalls and ensure a durable finish that stands the test of time.
Additionally, proper drywall installation contributes to the overall energy efficiency of your home. When drywall is installed correctly, it helps create an effective barrier that can reduce heat loss and improve insulation. This is particularly important in maintaining consistent indoor temperatures and lowering energy bills. Moreover, drywall that is properly fitted and sealed can enhance acoustic performance, minimizing noise transfer between rooms. These functional benefits, combined with a flawless finish, underscore the importance of mastering drywall installation techniques.
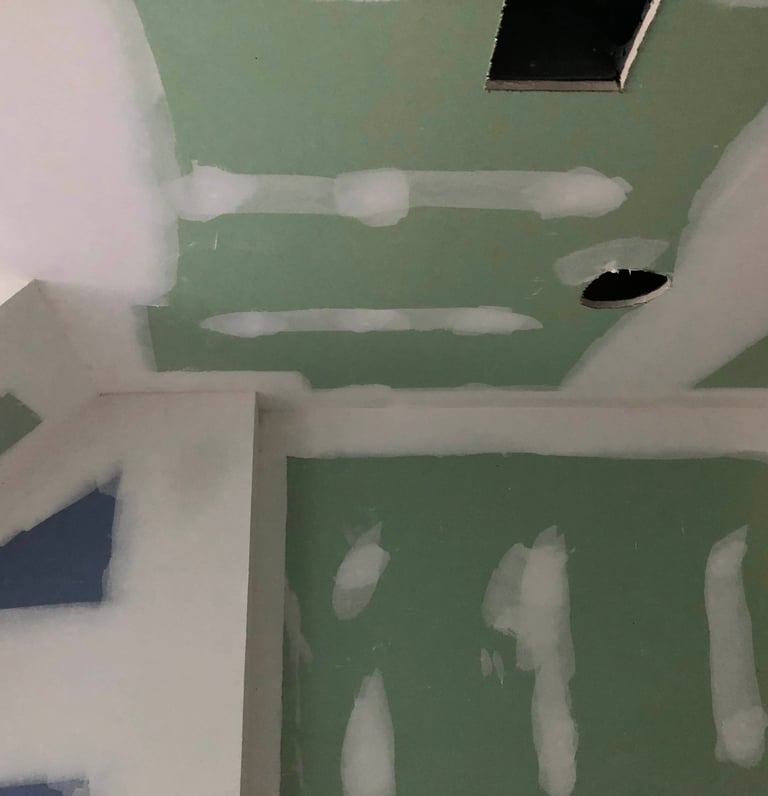
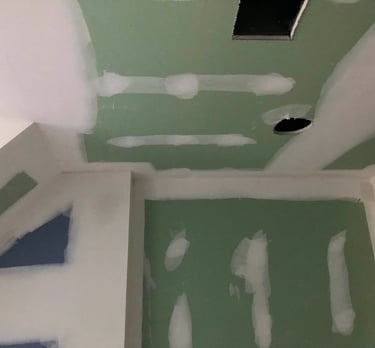
The Case for Drywalling Ceilings First
Drywalling the ceiling before the walls is a practice favored by many professionals, and there are several compelling reasons for this approach. One of the primary reasons is the structural support it provides. When the ceiling is installed first, the edges of the ceiling drywall can rest on top of the wall drywall, creating a stronger, more secure connection. This method helps prevent the ceiling drywall from sagging over time, especially in larger rooms where the span of the ceiling is greater.
Another advantage of installing the ceiling drywall first is that it simplifies the taping and mudding process. When the ceiling is done first, the wall drywall can be installed snugly against the ceiling, creating a tighter seam. This makes it easier to achieve a smooth, seamless transition between the ceiling and walls, reducing the likelihood of visible joints and cracks. Additionally, working from the top down minimizes the risk of damaging the wall drywall while installing the ceiling.
Installing the ceiling drywall first also allows for more efficient use of materials and tools. By starting with the ceiling, you can ensure that any gaps or irregularities at the top of the walls are covered by the wall drywall, resulting in a cleaner, more professional finish. This method also allows you to use longer sheets of drywall for the ceiling, reducing the number of seams and making the installation process quicker and more efficient. Overall, drywalling the ceiling first offers several practical and aesthetic benefits that contribute to a superior finished product.
Finishing Touches: Taping and Mudding
The taping and mudding process is a critical step in achieving a smooth, seamless finish on your drywall installation. This process involves applying joint tape and joint compound to the seams and joints between the drywall sheets, as well as to any screw or nail holes. The goal is to create a seamless surface that can be painted or finished without visible joints or imperfections.
To begin, apply a thin layer of joint compound along the seams using a wide taping knife. Press the joint tape into the compound, ensuring that it is centered over the seam. Smooth out any air bubbles or wrinkles, and apply a second layer of joint compound over the tape, feathering the edges to create a smooth transition. Allow the compound to dry completely before applying additional coats, sanding between each coat to achieve a smooth finish.
When applying the final coat of joint compound, take care to feather the edges and blend the compound into the surrounding drywall. Use a sanding sponge or fine-grit sandpaper to smooth out any imperfections, taking care to avoid sanding too much and exposing the tape. Once the surface is smooth and free of defects, it is ready for priming and painting. Properly taping and mudding the drywall is essential for achieving a professional finish that enhances the overall appearance of your space.
Overview of Drywall Types and Materials
Drywall, also known as gypsum board, comes in various types and materials, each suited for different applications. Understanding the different options available can help you choose the right type for your specific project. The most common type is standard drywall, which is composed of a gypsum core sandwiched between two layers of paper. This type is suitable for most interior walls and ceilings where moisture is not a concern.
For areas prone to moisture, such as bathrooms and kitchens, moisture-resistant drywall, often called green board, is a better option. This type of drywall has a green-colored paper covering that is treated to resist moisture and mold. Another specialized type is fire-resistant drywall, which contains glass fibers in its core to increase its fire resistance. This type is often used in areas where building codes require enhanced fire protection, such as in garages or between living spaces and attached garages.
There is also soundproof drywall, designed to reduce noise transmission between rooms. This type of drywall typically has multiple layers of gypsum and other materials to enhance its sound-deadening properties. For curved surfaces, flexible drywall, also known as bendable drywall, can be used. It is thinner and more pliable, allowing it to bend without breaking. By selecting the appropriate type of drywall for your project, you can ensure optimal performance and durability.
The Case for Drywalling Walls First
While drywalling the ceiling first is the preferred method for many professionals, there are situations where drywalling the walls first may be advantageous. One scenario where this approach might be beneficial is in rooms with low ceilings or tight spaces. In such cases, installing the wall drywall first can provide better access and maneuverability when working on the ceiling. This can make the installation process more manageable and reduce the risk of injury or damage to the drywall.
Another reason to consider drywalling the walls first is if you are working alone or with a small team. Ceiling drywall sheets are large and heavy, making them difficult to handle and position without assistance. Installing the wall drywall first can provide additional support and stability when lifting and securing the ceiling drywall. This approach can also allow you to use smaller, more manageable pieces of drywall for the ceiling, making the installation process safer and more efficient.
In some renovation projects, the existing wall structure may already be partially finished or in need of repair. In these cases, it may be more practical to address the walls first before moving on to the ceiling. This can help ensure that the wall framing is properly aligned and secure, providing a solid foundation for the ceiling drywall. Additionally, installing the wall drywall first can allow you to address any electrical, plumbing, or insulation issues within the walls before closing them up, ensuring that all necessary work is completed before the final finish.
Factors to Consider When Deciding
When deciding whether to drywall the ceiling or walls first, several factors should be taken into consideration to determine the best approach for your specific project. One of the most important factors is the size and layout of the room. In larger rooms with high ceilings, installing the ceiling drywall first can provide better structural support and reduce the risk of sagging.
Another factor to consider is the level of experience and expertise of the installation team. Professionals with experience in drywall installation may find it easier and more efficient to install the ceiling first, while DIYers or those with limited experience may prefer to start with the walls for better control and stability. Additionally, the availability of tools and equipment can influence the decision. Using specialized tools such as drywall lifts or scaffolding can make ceiling installation more manageable, while those without access to such tools may find it easier to start with the walls.
The condition of the existing structure and any necessary repairs should also be taken into account. If the wall framing needs to be adjusted or reinforced, it may be more practical to address these issues before installing the ceiling drywall. Similarly, if there are any electrical, plumbing, or insulation work that needs to be done within the walls, it is best to complete these tasks before closing up the walls with drywall. By considering these factors, you can make an informed decision that best suits the needs of your project.
Common Mistakes to Avoid in Drywall Installation
Even with careful planning and consideration, mistakes can still occur during drywall installation. One common mistake is not properly securing the drywall to the framing. This can result in loose or uneven sheets that are prone to sagging or shifting over time. To avoid this, make sure to use the appropriate type and number of screws or nails, and ensure that they are driven into the studs or joists at regular intervals.
Another frequent mistake is not properly aligning the drywall sheets. Misaligned sheets can create uneven seams and joints, making it difficult to achieve a smooth finish. To prevent this, take the time to measure and mark the placement of each sheet before installation, and use a level to ensure that they are properly aligned. Additionally, be mindful of the orientation of the drywall sheets, as installing them in the wrong direction can affect the overall strength and stability of the finished wall or ceiling.
Gaps and irregularities between the drywall sheets are another common issue that can compromise the quality of the final finish. To avoid this, make sure to cut the drywall sheets accurately and use shims or spacers to fill any gaps. It is also important to properly tape and mud the seams to create a smooth, seamless surface. Rushing through this process or using inadequate materials can result in visible joints and cracks that detract from the overall appearance of the finished project.
Tools and Techniques for Efficient Drywalling
Having the right tools and techniques is essential for efficient and successful drywall installation. One of the most important tools is a drywall lift, which can help you safely and easily position and secure large sheets of drywall on the ceiling. This tool can save time and effort, especially when working with heavy or cumbersome sheets. For wall installations, a T-square and a utility knife are essential for making precise cuts and ensuring that the sheets fit snugly against each other.
A screw gun or drywall drill is another indispensable tool for efficient drywall installation. This tool allows you to quickly and securely fasten the drywall sheets to the framing without the risk of overdriving the screws. Additionally, a tape measure and a chalk line are useful for marking the placement of the drywall sheets and ensuring that they are properly aligned. For cutting holes for electrical outlets, light switches, or other fixtures, a keyhole saw or rotary tool can make the job easier and more precise.
In addition to the right tools, mastering the proper techniques is crucial for achieving professional results. When hanging drywall, it is important to start from the top and work your way down, ensuring that each sheet is properly aligned and secured before moving on to the next. When taping and mudding the seams, use a wide taping knife to apply a thin, even layer of joint compound, and feather the edges to create a smooth transition. Sanding between coats and using a dust-free sanding sponge can help achieve a flawless finish.
Conclusion and Best Practices for Drywall Installation
In conclusion, deciding whether to drywall the ceiling or walls first is a crucial step that can significantly impact the outcome of your renovation project. While there are valid arguments for both approaches, installing the ceiling drywall first is generally favored by professionals for its structural support, ease of taping and mudding, and efficient use of materials. However, factors such as room size, layout, and the experience level of the installation team should also be considered when making this decision.
To achieve the best results, it is important to avoid common mistakes such as improper fastening, misalignment, and gaps between the drywall sheets. Using the right tools and mastering the proper techniques can make the installation process more efficient and successful. The taping and mudding process is essential for achieving a smooth, seamless finish that enhances the overall appearance of your space.
By following best practices and carefully considering the unique needs of your project, you can ensure a flawless drywall installation that provides both aesthetic and functional benefits. Whether you are a seasoned professional or a DIY enthusiast, understanding the importance of proper drywall installation and the factors that influence the decision-making process can help you achieve professional results that stand the test of time.